Network configuration
Company network with dynamic IP addresses (DHCP server is on)
IMAC is preconfigured to get IP address automatically from DHCP server in your local company network. If your company network is configured to provide IP addresses automatically you are good. Just plug ethernet cable in and start working.
Company network with static IP addresses
If your company network works with static IP addresses you have to set up static IP on IMAC. If it has not been preset on factory for you by your order, follow instructions below:
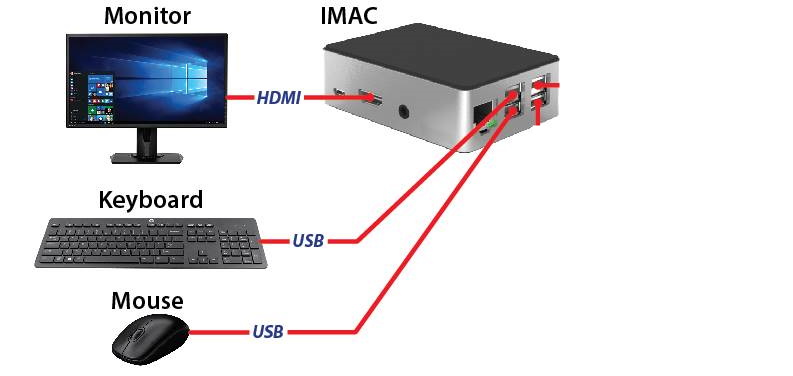
- Connect keyboard, mouse and HDMI monitor to IMAC. Power it up and wait OS loading is completed.
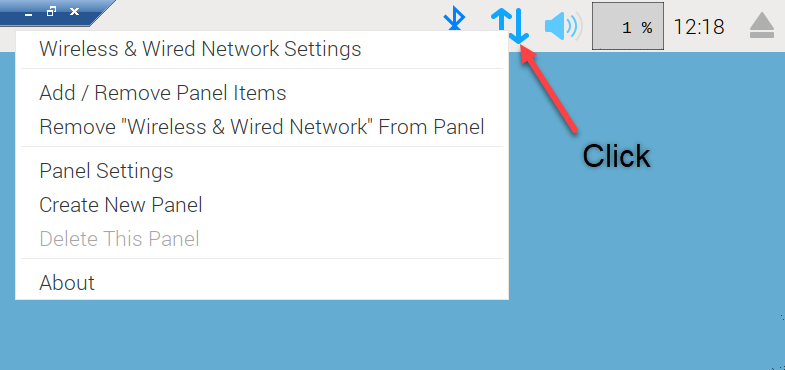
- Right click on the icon as shown and left click Wireless & Wired Network Settings.
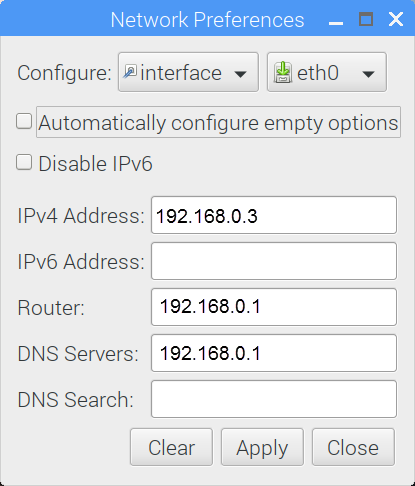
- Select the interface. Select
eth0for wired orwlan0for wireless. Obtain IP address from your network administator from the range your company's network is working. For example, type192.168.0.3to assign192.168.0.3IP address to IMAC. Assign the IP address of your router –192.168.0.1. Assign the address of DNS server -192.168.0.1. Click Apply. In case you are configuring wireless connection the additional step is required.
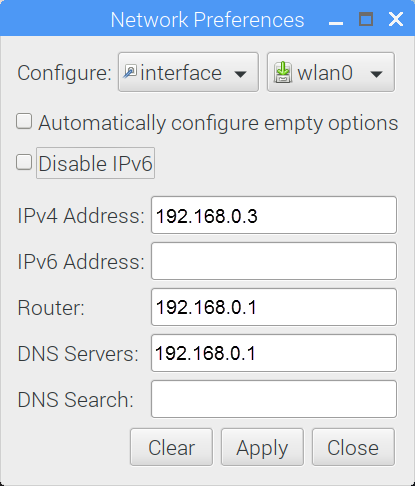
- Additional step: if you are configuring wireless connection you need to open the terminal.
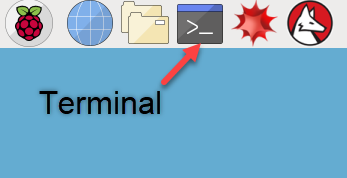
In the terminal type sudo raspi-config. The textual menu will be opened.
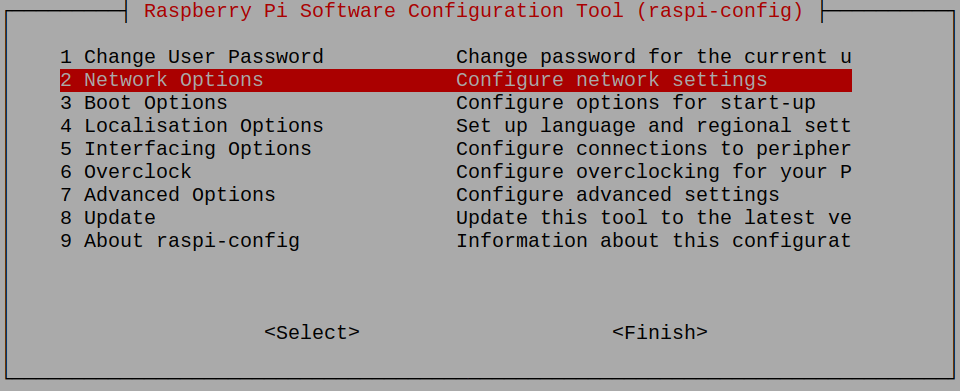
Select Network Options. You will be asked for Country, Wifi network’s name and password. When you complete press Finish.
- Reboot IMAC and unplug keyboard, mouse and HDMI monitor. IMAC is ready for use in the network. Open Google Chrome (recommended browser) and go to
http://imac:5000.
Isolated network
Also IMAC can be used in isolated networks where IMAC and user computer are connected directly over Ethernet Crossover cable or using the Ethernet switch/router.
To get IMAC working in isolated network follow instructions below:
- On user computer with Windows operating system navigate to Network Connections
Here is 5 Ways to Open Network Connections from CMD and Windows 10 GUI
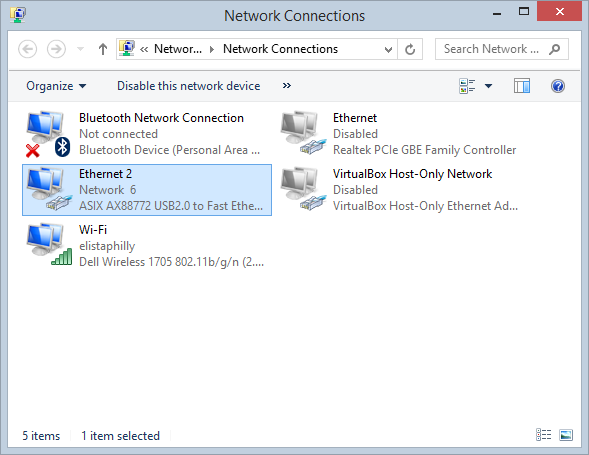
- Right click on USB-to-Ethernet connection and select Properties.
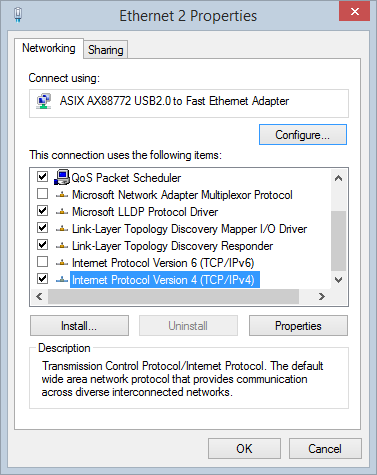
- Scroll down, select TCP/IPv4 and click Properties. Fill out as shown below.
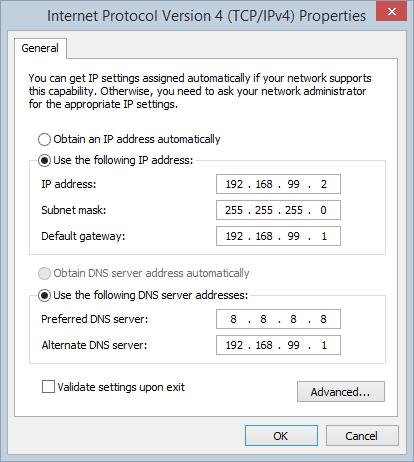
- Apply changes and close dialog windows. IMAC comes preconfigured with IP address 192.168.99.1 for isolated network. Now you can open Chrome browser and go to
imac-yourcompanyname:5000to start working. For example:imac-amazon:5000.